
As an ESL teacher I taught through a mix of pull-out and push-in instruction. I loved being able to go into my students' classrooms! I got to meet their classmates, work closely with their teachers, and support them with their classwork. I also loved the times when I had the small group in my own classroom for targeted language instruction. However, being in and out of the classroom regularly was tough for my type-a personality! I struggled to stay organized with materials, supplies, and schedules. Here are a few things I learned that helped me, and my students, make the most out of our time together!

Student Supply Bin
When I first started teaching I thought my students would bring their own supplies to our pull-out groups. I was disabused of that notion quickly. There was no way I could expect 1st graders to remember to bring crayons, scissors, and glue to our group from their classroom. So I quickly learned that I needed to keep all of those supplies in my classroom. The next conundrum was where to keep the supplies so that we could access them easily, but they weren't in the way. After a few variations I landed on a basket of supplies organized into cups or baskets, which I would keep within arms reach. Usually that meant on one end of my beloved kidney table.

The staples in the supply bin were: pencils, cups of crayons, scissors, and glue sticks. I would have enough to hand out so that each student could use their own without having to share. I also frequently had highlighters, markers, and post-it notes in the bin. While the supply bin changed shape and evolved over the years, it always helped keep us organized.
Student Materials Drawers
Another organizational struggle for my pull-out groups was where to keep the materials that stayed in my classroom. My students would have notebooks or binders, and often reading materials that would need a home in my classroom when they weren't there. I tried mailboxes and file folders in a milk crate, but was never satisfied. With the mailboxes students were always just jamming materials inside, which frequently meant ripped pages and damaged books. The file folders didn't like the heavy notebooks and books and would frequently rip.

After a few years I ended up with the 12x12 scrapbook paper storage drawers. I would label the front of the drawer with each student's name. Because the drawers could be pulled open there wasn't the cramming it all in issue we'd had with the mailboxes. And since they were made of a sturdy plastic they held up better than the hanging files in a milk crate. The drawers would always be placed close by the kidney table where we were working. Within a few weeks of using the drawers, I rarely had to remind students where their materials were, or replace lost or damaged materials.
Teaching Materials Bins
Along with organizing student materials I needed to figure out a way to organize my own teaching materials. My organizational style for these materials changed every single year, depending on my groups and my schedule. However, the one I would come back to the most frequently were the colorful book boxes I picked up at Target. I found that using those - one for each group - kept my materials the most organized.

Within those book bins I would use file folders to separate out the days. For my push-in materials I loved using spiral bound folders. I could organize the materials by the day, and take the entire set of folders with me to the push-in class. That way if I needed to move ahead to the Thursday's materials on Wednesday I always had them with me. I kept these bins close to my desk - either on a table or bookshelf nearby.
DIY Lesson Planner
I think it is time for a confession... I am not actually a type-a person. I am more of a type-b person, who really wants to be a type-a. I use organizational supplies and planners to help move me in that direction. In fact I love planners. I am always on the lookout for a good planner. And there are lots of awesome lesson planners out there. But none of them ever worked for me. This one was too big, that one was too small. This one had too much that I didn't need, this one didn't have what I needed at all. So for me a DIY planner was a must.

When I was creating my ideal planner I did not want it to be BIG. I didn't want it to take up a lot of space on my desk. That was why I ended up with a half-page sized planner. Luckily, I did not need to write a lot of details in my lesson plans to be able to turn them in - a simple 'Chapter 2' would do in my plan book. (Don't worry - there were detailed unit plans and a scope and sequence elsewhere - they just weren't in my day-to-day planner). For a while I used a daily lesson planner, but I eventually shifted to a weekly planner so that I could easily view the entire week. I also preferred a binder planner system to something spiral bound so that I could add and take away pages as needed. You can find the planner I created in my Teachers Pay Teachers store, or by clicking either of the images below.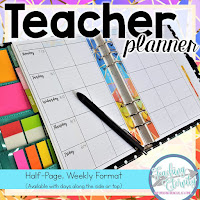

A few bonus tips:
- Keep your schedule with you - I kept mine in the pouch on my lanyard. This way I wouldn't lose track of where I needed to be next.
- Use color coding - Each grade level had it's own color for student files, meeting notes, phone calls etc. There was even a year when I wrote lesson plans in the colors that corresponded with my color coding system.
- Create a list of tasks that need to be completed, how often they need to get done, and when you will do them. For example, Wednesday was lesson planning day, so Thursday and Friday could be materials prep days.
- If an organizational strategy isn't working for you and your students - change it! Experiment with different strategies until you find what works. Chances are you will be tweaking your system each year - embrace the chance to find something just a little bit better.
I hope some of these tips will be useful to you! If you use any of them I'd love to know about it - you can e-mail me at TeachingEternity@gmail.com or reach out on Instagram @TeachingEternity.


