SOCIAL MEDIA


A few weeks ago, my third grade cooperating teacher and I started our Opinion Writing unit.  We defined opinion, modeled opinion writing, provided students with a graphic organizer.


Common Mistakes

They all got to work writing about a Noteworthy Person.  As we started conferencing however we noticed a troubling trend in their writing pieces... our students were struggling with either:
 A.) The difference between a REASON and an EXAMPLE (to support the reason)
or
B.) Making sure their EXAMPLES matched their reasons!
or
C.) Writing really vague and unspecific reasons

We knew we had to do something, and I knew I had the perfect opinion piece to help them really Get It!


Classroom Activity

Step one: Find an opinion essay that is relate able and well-organized (if you don't have one, you can find mine at the bottom of this page). I had written this essay as a model for my 5th grade students a few years prior.  My 3rd graders felt like rock-stars when I told them they were going to be using a 5th grade essay!  I spaced out my essay leaving my Introduction and Conclusion paragraphs in tact, then putting my reasons, and 3 examples each on separate lines so they could be cut apart.

Step 2: Provide students with their Opinion Essay Organization Kits.  Mine consisted of 4 markers, one long sheet of construction paper (I cut a large sheet in half), and my cut apart essay.


Step 3: Students should locate the full paragraphs and determine which is the Introduction and which is the Conclusion.  This was a no-brainer for them since my conclusion literally begins "In conclusion".  However, we were also trying to get them to use appropriate transitional phrases, so this was another way to drive this idea home.  We used the yellow marker to highlight the transitions. Then they glued the introduction at the top, and the conclusion at the bottom.


Step 4: I asked the groups to read through the introduction to find my three reasons.  Again, they had to look for transitions here.  They highlighted the transitions in yellow, reason one in pink, reason two in green and reason three in purple.


Step 5: Now they had to search through the twelve smaller pieces to find my reasons again, since my reasons were also the first sentence of each of my paragraphs.  They had begun to catch on to the importance of the transition words and started looking for them at the beginning of the sentences.  I tricked some of them by using different transitions than I did in my introduction, but they figured it out quickly enough.  Once again we highlighted the transitions in yellow, and put dots on the slip to match the colors in the introduction (1= pink, 2= green, 3= purple).

Step 6: This was the hard part.  They had nine strips left, three examples for each of my three reasons.  They had to put these examples in the correct paragraph with the correct reason.  Some of these were easier than others.  They worked together though to figure it out.  Once that part was done we congratulated them on meeting our activity objective... but we weren't finished yet!


Step 7: This was the really hard part!  This, I told them was the challenge; this, was where they got to think like 5th graders.  They had to put the examples in an order that made sense!  If the example had the word HOWEVER that meant it had to come after an example stating the opposite (back to the importance of the transitions).  They also had to think about Big Idea to Small Idea.  This was something we did mostly as a whole group, until VOILA! my essay was complete.


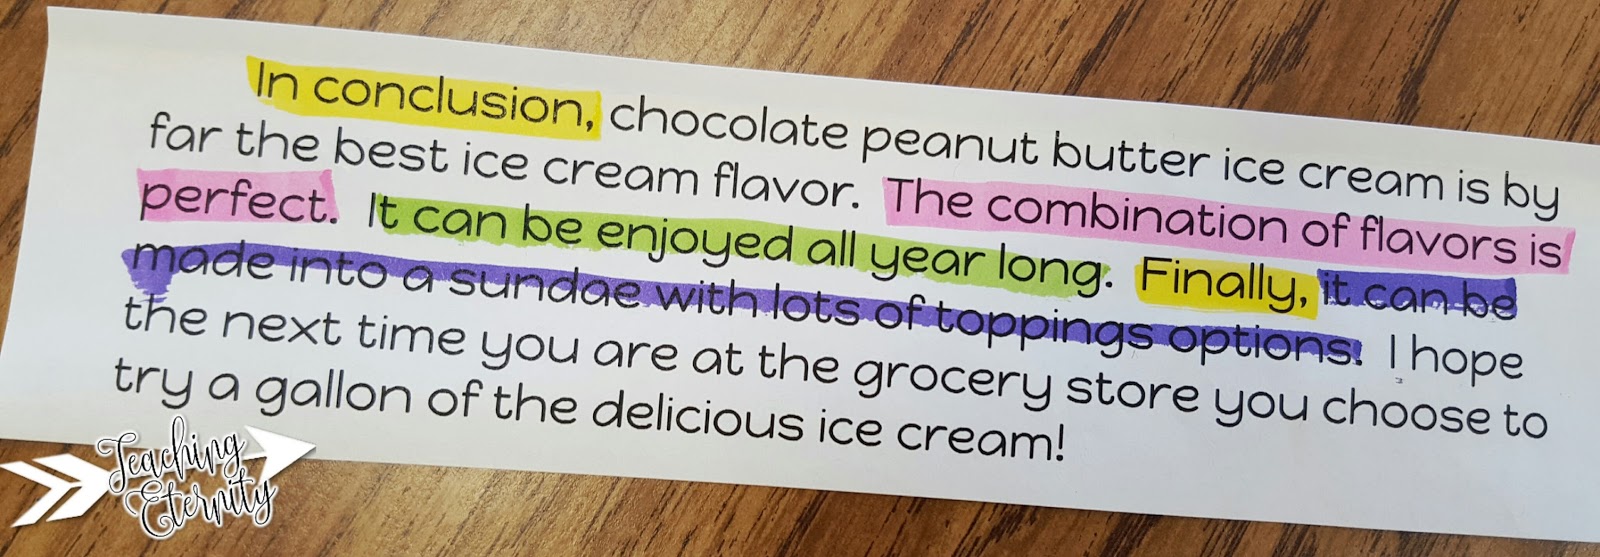
Ok, one more step... we highlighted where I restated each reason in my conclusion as well!


Help Your Students Organize their Opinion Writing with this Engaging Activity

Thursday, April 13, 2017


I love quotes.  Funny quotes, motivational quotes, spiritual quotes, sentimental quotes.  You find a quote... I can find a use for it.  I especially like to put them in my planner.  (If you've read my blog you know I am a #planneraddict ... read about it here, here and here).

I found a bunch of quotes for moms and quotes for teachers and made some printables to get you started. These are sized perfectly to fit in the Erin Condren Life Planner (Vertical), if you'd like to print them out for your planner.  Or you can print them to pass out to friends or display around your desk at school.  Maybe hide one or two to find on a particularly challenging day!


I sincerely hope you enjoy these quote stickers! I hope they make both your good and bad days just a bit brighter!

Other planner printables (clickable links)


Quote me on it...

Sunday, April 2, 2017

As an ENL teacher I often push-in to writing instruction at multiple grade levels.  One thing I notice students struggling with over and over is where to put quotation marks. Either they put quotations around the entire sentence or only a few words!  I tell students all the time, "Quotation marks are not confetti!"


So how do I combat the quotation confetti?  Every year at every grade level during the narrative writing unit the topic of how to use quotation marks comes up.  In first grade I teach students my trick.  What's my trick? 


It's that simple... I tell them to imagine a speech bubble.  Any words in the speech bubble go inside the quotation marks.  Then we practice with some sentences! 

I show three examples; one with the dialog after the tag, one with the dialog before the tag, and one with the tag in the middle.  I will briefly touch on putting in commas and capitalizing the first word... but don't expect them to remember that one right away. (I usually start emphasizing it in second and third)  

Find these practice sheets for FREE here

Then, they will have a laminated blank speech bubble in their writing binder or folder.  If they are confused in the future they can use their dry erase markers to test out what goes inside the speech bubble and therefore inside the quotation marks.

Birthdays are a popular narrative topic!
Is this a perfect strategy? Certainly not!  Students still need reminders to think of their speech bubble. After the initial lesson in first grade I will ask in second, third (etc), "Do you remember Mrs. H's trick?"  Many students who were in the class the previous year will remember.  By third grade they are explaining my trick to their classmates!

Want to share this with friends?  Pin this image:


Find the Practice Sheets you see in the post here:


 photo Signature_zps73d808b4.png

Quotation Marks are NOT Confetti

Thursday, March 16, 2017

Is your school a PBIS (Positive Behavior Interventions and Supports) school?  Does your school struggle with a high number of bus referrals?  My school is a PBIS school and 4 years ago bus referrals had us scratching our heads.

In the summer of 2013 my school's PBIS team, of which I am a member, met to discuss our yearly goals and initiatives.  Looking at our referral data from the previous year we noticed a high number of bus referrals.  To be specific, there were 98.  This may not seem like a lot to you, but for our school it was a hot spot.  We wanted to do something to decrease the number of bus referrals.  We discussed prizes for the buses that went without for a month, but that would be difficult to coordinate, and we were trying to get away from prizes for simple good behavior.  Thus "Riding Referral Free" was born!


We came up with the idea that we would use a thermometer and fill in for each day that the entire bus went without a referral.  If a referral happened on the bus the entire thermometer was reset and started again at zero.  I volunteered to create the display, and maintain it.  It looked something like this (I don't have an actual picture 😣)


The posters were laminated so I could fill them in each day with a white board marker.  Every time the bus reached 30 it would get a star at the top, and I'd start coloring in again from the bottom. I spent some time going to each class to explain how it worked.  I also made sure I was out at the display during dismissal coloring in the bars as a visual reminder to students to behave on the bus.  

I remember one day a student who was frequently getting bus referrals walked by as I was erasing and resetting their bus back to zero after they had a received a referral.  They asked me why I had to erase them all, and I said "Well, someone on this bus got a referral, so we start counting back at zero." The student said, "Oh, ok." and walked away.  That was his last bus referral of the year.

This worked amazingly well for the rest of the students too, and for the next two school years ('13-'14 and '14-'15) our bus referral numbers were 28 and 24.  Last school year our numbers jumped again to 47.  So we knew we needed to change it up to get their attention.  We also wanted a change because the coloring and erasing was tedious!

So we decided to create a smaller, but more colorful display.  We placed it right across from our entrance where every student will see it at least twice a day when they enter and leave the building.

Each bus (AM and PM) has it's own 12x12 page.  On that page is a bus silhouette with the number cut out of the side (this was done with a Cricut die cutting machine).  

Each bus chart has 3 command hooks, so we can count up to 180 days total.  The numbers were printed on cardstock, cut, hole punched and put on binder rings.  

Then the rings were hung on the command hooks.  Each morning one of our teachers flips the cards to the next number.  When a bus has a referral their number goes back to zero.
  
And it's working!  This year we have had only 7 bus referrals (half way through)! I love seeing it myself every morning.  


 photo Signature_zps73d808b4.png

Riding Referral Free - PBIS on the bus

Saturday, January 14, 2017

Instagram