SOCIAL MEDIA

Showing posts with label Teachers Pay Teachers. Show all posts
As an ENL teacher I often push-in to writing instruction at multiple grade levels.  One thing I notice students struggling with over and over is where to put quotation marks. Either they put quotations around the entire sentence or only a few words!  I tell students all the time, "Quotation marks are not confetti!"


So how do I combat the quotation confetti?  Every year at every grade level during the narrative writing unit the topic of how to use quotation marks comes up.  In first grade I teach students my trick.  What's my trick? 


It's that simple... I tell them to imagine a speech bubble.  Any words in the speech bubble go inside the quotation marks.  Then we practice with some sentences! 

I show three examples; one with the dialog after the tag, one with the dialog before the tag, and one with the tag in the middle.  I will briefly touch on putting in commas and capitalizing the first word... but don't expect them to remember that one right away. (I usually start emphasizing it in second and third)  

Find these practice sheets for FREE here

Then, they will have a laminated blank speech bubble in their writing binder or folder.  If they are confused in the future they can use their dry erase markers to test out what goes inside the speech bubble and therefore inside the quotation marks.

Birthdays are a popular narrative topic!
Is this a perfect strategy? Certainly not!  Students still need reminders to think of their speech bubble. After the initial lesson in first grade I will ask in second, third (etc), "Do you remember Mrs. H's trick?"  Many students who were in the class the previous year will remember.  By third grade they are explaining my trick to their classmates!

Want to share this with friends?  Pin this image:


Find the Practice Sheets you see in the post here:


 photo Signature_zps73d808b4.png

Quotation Marks are NOT Confetti

Thursday, March 16, 2017

On Sunday, September 18th I posted a FB Live video all about my plans for fall week with my Kindergarten student.  They were lovely plans, full of hope and high expectations.  However, things did not go that way due to this, that, and the other thing.  So I thought I'd pop-in and share what actually happened during our Fall Vocabulary Weeks (because we stretched it through 2 weeks)!


Monday 9/19 - Today went as planned.  I started by introducing the vocabulary words for the week.  My student already knew 2 of the 6 words (apple and pumpkin), which was good to build his confidence, and give him a point of reference.  We practiced saying the words with him repeating them after me three times.  
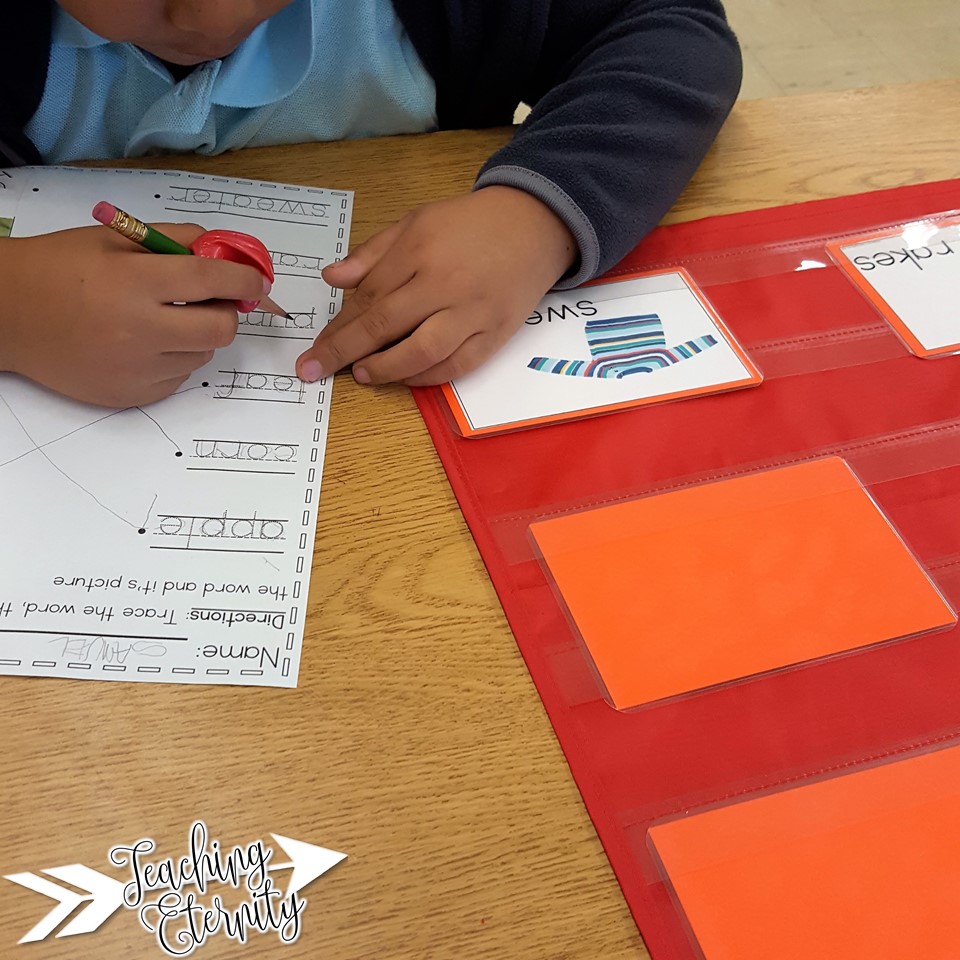
We then moved to the table to work on our listening activity.  I brought the pocket chart with words over to the table so that we could reference the words he didn't know like sweater and rakes.


Tuesday 9/20 - Another day as planned.  We started by reviewing our words (3 times again) and then we moved to the table to trace and match our words.  At first this was more difficult for him than I anticipated, even with the pocket chart right there to reference.  About half-way through though he figured out the expectation and did very well.  

We then moved back to our mat to read the Apple Tree poem.  He thought this was a lot of fun.  Especially when we pretended to pick one of the apples and eat it!  We moved back to the table one more time and he was able to color in his own copy of the poem.  We discussed the colors of an apple tree.


Wednesday 9/21 - We started our time together just as any other day, by reviewing our words three times.  Today was the day he produced the third word independently (rakes).  We read our easy reader by him repeating me.  However he did practice pointing to each word.  Then we did a picture sort of 'Things you see in fall; Things you do not see in fall".  I wish I knew where this activity was from, but I do not.  I downloaded it (I think) from a blog post years ago, and I can not find it again.  


Thursday 9/22 - We started again by reviewing our words.  Then I read the book Fall Leaves Fall by Zoe Hall.  This was an interactive read-aloud, and we stopped to talk about the pictures and text frequently.  Then we went to the table and I introduced the writing task.  I showed him the pictures from the book again of all the things to do with fall leaves.  His favorite was to make a monster, and so he drew a leaf and made it a monster!  It was a super cute picture.  I wrote his sentence.  He started to trace it, but we ran out of time to finish.

Friday 9/23 - Our group was cancelled due to a scheduling conflict with school pictures and library time.

Monday 9/26 - Once again we reviewed the words.  I re-read Fall Leaves Fall and we traced and colored fall leaves using this freebie from KidSparkz.  He really enjoyed matching the leaves in his book to the shapes of the leaves in the read-aloud. He colored his pages to match the leaves in the book.  

Tuesday 9/27 - We reviewed the words to start our time and he was able to recognize apple, pumpkin, rakes and leaf independently.  I wanted to do some speaking practice so we sequenced the steps of making a jack-o-lantern.  I printed off the colored copy and student cut and glue page from this free pack by S is for Sarah.  We did the colored one together then talked through it.  I'd point to one of the pictures and he'd say what he saw, then I would turn that into a full sentence for him to repeat.  For example the 4th picture was drawing a face on the pumpkin.  My student said "face", I gave the sentence "Draw a face on the pumpkin" then he repeated it.  Then I gave him the student activity sheet and he cut out and glued the steps in order.  I explained that the first picture was of a pumpkin, and at the end it was a jack-o-lantern with a face.
  

Wednesday 9/28 - I was unable to be in school. :(

Thursday 9/29 - When we reviewed the words this day he knew all but sweater independently.  I decided to focus the day on apples and do some letter recognition practice, and sight word practice.  We re-read our apple poem.  Then I gave him this tree to color the apples either red, yellow, or green depending on the letter I'd put in them.  

Then we read the sight word sentence at the top, which featured the week's focus words.  Then I used the "I like..." flip book from Lavinia Pop's Fall Sight Word Fluency Flip Books.  He really liked this book.  

Friday 9/30 - The plan for today was to glue our fall words into his picture dictionary, however it hadn't come back from our printer yet.  So we reviewed our words and played memory.  We needed the pocket chart to make sure the words matched with the pictures.  I was really happy with his recall of what each picture was.  I didn't expect him to actually read the words independently at this point, but he learned the routine of the game and strategies to figure out the words by checking in the pocket chart.   I sent home the activity pages we'd finished along with some fall books from Reading A-Z today too!


So, all in all, things did not go completely as planned, but I think they went even better.  We did a lot of listening, speaking, reading and writing practice.  I was very happy with the progress my student made in recognizing and using the vocabulary.  The majority of our activities from the first week of our fall unit can be found in my Fall Vocabulary Unit in my TPT store.  We will spend the next few weeks focusing on school vocabulary: People, Places, Supplies and Things We Do at School.  


 photo Signature_zps73d808b4.png

Fall Vocabulary Unit: The Reality

Monday, October 3, 2016


Ok, so I am totally addicted to my planner (as evidenced Here and Here)... in fact my planner has it's own Instagram account! 


In January this past school year I switched my teacher planner to a daily layout, with inserts I'd made myself for an A5 Carpe Diem planner.  It was perfect for my ever changing schedule.  I had enough space without being overwhelmed, and I wasn't stuck in rows and sections!

So for the 2016-2017 school year I will be in my Carpe Diem again Filofax Domino, with daily printouts.  I made a few updates, such as adding note pages and student info pages.  I also added some color to the pages.  I am excited about lesson planning!

These planner pages are available as a digital download in my TpT store
So now I have a completely pretty and functional planner! But I'm not done yet.  I gave my crafty side a workout and came up with 3 ways to make my planner even prettier and more functional!


What you need: Page Protectors, Cutting Tool (I used a paper cutter), Washi Tape, and Hole Punching Tool (I got mine from Amazon).


The first thing you need to do is cut down your page protectors.  I cut mine to be 6 inches wide and 8.75 inches tall.  Make sure you cut off the side with the holes and the open top! Do not cut off the sealed bottom or the closed side.  When you are done you have a page protector that looks like this!


Now it's time to Washi! I used the grid lines on my cutting board to make sure I got my washi down straight, with about a quarter of an inch of overhang.  The overhang is so that the open side will seal. The beautiful thing about washi?  If it doesn't go down straight... it easily pulls up so you can try again.  I chose to use this more plastic-y (is that a word?) washi from scotch.  I thought it matched better, and I thought it would hold up to the turning and tugging on the rings better.


Now you should have a plastic pocket sealed on 3 sides.  Stick that bad boy in your hole punch, and get it in your planner! (I added a decorative strip of gold polka dot washi... just because I could!)


For these you need some paperclips and ribbon.  I would also suggest some liquid glue and hot glue or super glue.  

These are easy-peasy to make!  Cut your ribbon to about 5-6 inches long.  Fold them in half and insert them into the top end of the paperclip.  Then pull the ends through the hole and tighten!


Then you trim the excess ribbon off, and voila.  I would recommend that you put a little bit of glue on the ends to keep the fraying to a minimum.  I would also recommend that you put a dot hot glue or super glue on the back so that the ribbons stay in place!


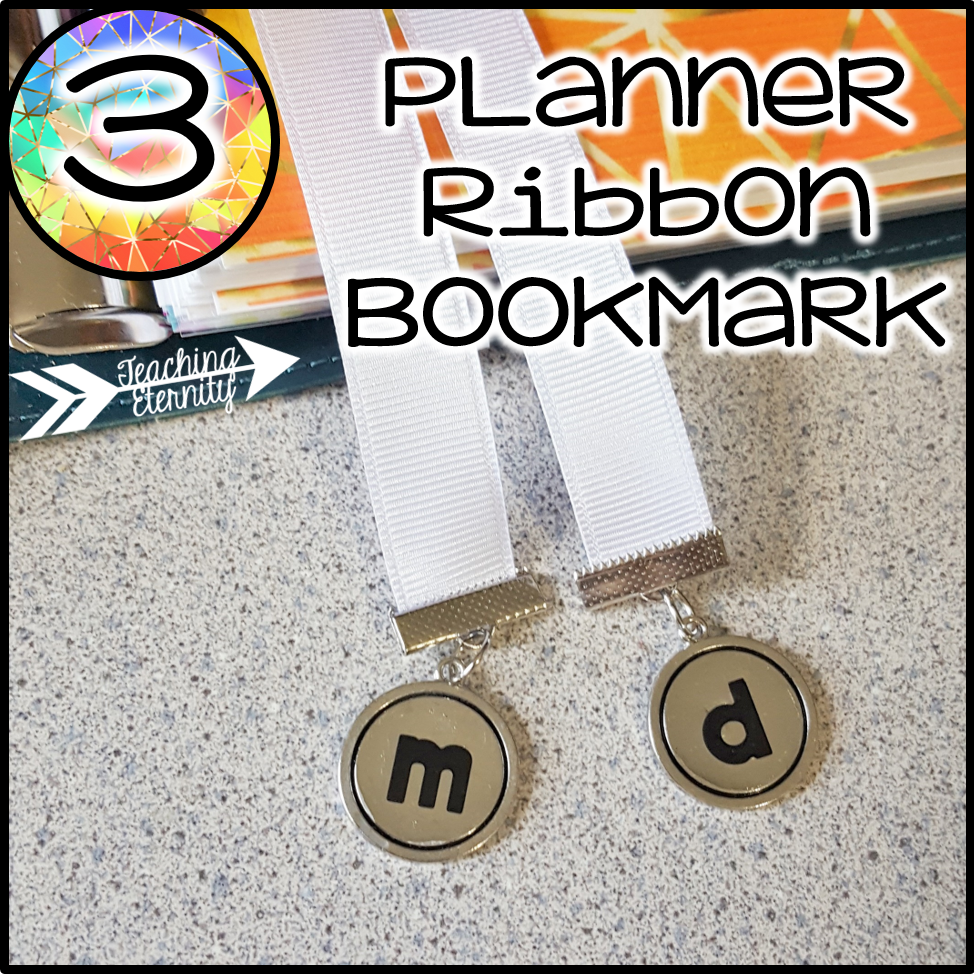
I wanted a way to easily mark where I was in my monthly and daily plans, so I created this ribbon book mark.  For this project I needed ribbon, needle and thread, a vest buckle and ribbon ends (from Joann Fabrics - Jewelry section).  I picked up these blank slate charms from Hobby Lobby (also in the jewelry section).  You can use any bead or charm.  I also had some stickers to label my charms. Not pictured is my super glue and scissors.

The first thing I did was put the 'm' and 'd' stickers on my charms.  I put a light layer of super glue over it (I had it open from finishing my ribbon clips).  I wanted to do these first so they would have a chance to dry while I did the rest.

Next I cut the ribbon roughly 4 times as long as my planner is high.  I stacked the two ribbons one on top of the other and looped it around the center bar of the vest buckle.  I stitched it closed with my needle and thread.  I am not a sewing expert, so it's not pretty, but it's functional.  I just went back and forth a few times to make sure it was secure.  Then I threaded my two ribbons back around the the vest clip.  Now you should have a loop on one side of the vest clip and two loose ribbons on the other.

Next I put the loop around the back of my planner and tightened it down.  This took some finagling on my part, pulling on the bottom ribbon and then on the top, Once I had it tightened down the way I wanted I flipped it over and pulled the loose ribbons down in front of my cover.  I trimmed the ribbons to be about 2 inches longer than my planner.  This will make them hang out the end once it's closed.  


I used my needle nose pliers to clamp on the ribbon ends.  I found it helpful to close them a bit first before putting the ribbon in since it was hard to hold and clamp at the same time.  I opened the link on the charm and slipped it onto the ribbon end and VOILA! Admittedly I had to take the charms off and put them on again because I'd put the monthly on the bottom ribbon and the daily on the top, but it was super easy to switch.

So now my planner is ready for a busy year.  Join me for a FB live broadcast tomorrow where I'll show off my set-up from front-to-back.

 photo Signature_zps73d808b4.png

Planner Projects - DIY

Thursday, August 11, 2016

As an ESL, ELL, ENL, LEP Emerging Bilingual teacher I teach a variety of students at a variety of grade levels in a variety of classroom situations.  I like to say that I'm flexible as long as you aren't asking me to touch my toes!  I have students in grades k-6, which I see in a mix of push-in and pull-out situations.  However one thing that I focus on with all of my students is vocabulary development. Given, though, that I have all these different groups and no space a traditional word wall is out of the question!  Which is where my dictionaries come in!

Both of these items can be found in my Teachers Pay Teachers store
In kindergarten and first grade I use the editable version of my picture dictionary. I teach thematically, from a pre-determined vocabulary list.  (It was something we developed as a team a few years ago).  Once the list is tweaked each summer I input all of the year's vocabulary words into the editable document.  As the year goes we spend a week working on the 6-8 vocabulary words within our theme and then on Fridays they are able to glue the vocabulary picture into their dictionaries.  Their picture dictionaries are pre-made with the words in them.  They have to find the word and glue the picture into the correct box.  This helps my students practice letter and word recognition along with dictionary skills.  In first grade I challenge them to put their words in ABC order first, then they do the rest!  They love it!  Then they have a book of all the words we've studied to take home with them at the end of the year.

I bind these picture dictionaries with the GBC ProClick Desktop Binding Machine. However you can use a coil binding machine or have it coiled at staples.  You can also choose to put it in a binder! Whatever system works best for you.

In second and third grade our vocabulary comes from the books that we are reading, which changes from year to year depending on the students.  This is where I move to the lined version of my picture dictionary.  I will teach any essential vocabulary prior to reading.  This is anywhere from 5-10 words for the week.  These words they write into the dictionary and draw their own picture.  I have moved this dictionary into a binder since these photos were taken, so that pages can be added as needed (you never know how many words you might have for each letter).  


In fourth through sixth grade the students will mark unknown words on their first read of a text.  From those I will create their vocabulary list.  They will write the word on the list page of their dictionary and then complete the word page.  If students are looking up the definitions on their own I like to use Word Central from Merriam-Webster.  Sometimes I'll present the words and definitions as a matching activity.  There are also times when we go through the text and use context clues to discuss and determine the definition as a group.  This is another of my dictionaries that I put into a binder so that pages can be added as needed. 


Both my students and I love that at the end of the year they have a record of their learning for the year.  Our dictionaries are a celebration of all that we have accomplished.  My teaching has gotten so much better because of them, and they are more engaged with their learning.  

 photo Signature_zps73d808b4.png

Student Dictionaries

Friday, March 25, 2016

Ok, so my latest obsession is my Erin Condren Life Planner.  I use it primarily for keeping my home life in order, however it is sometimes used for school stuff!  I have been making stickers for myself and buying stickers from many different ETSY shops.

Well I decided that I would like to sell the stickers I am making...

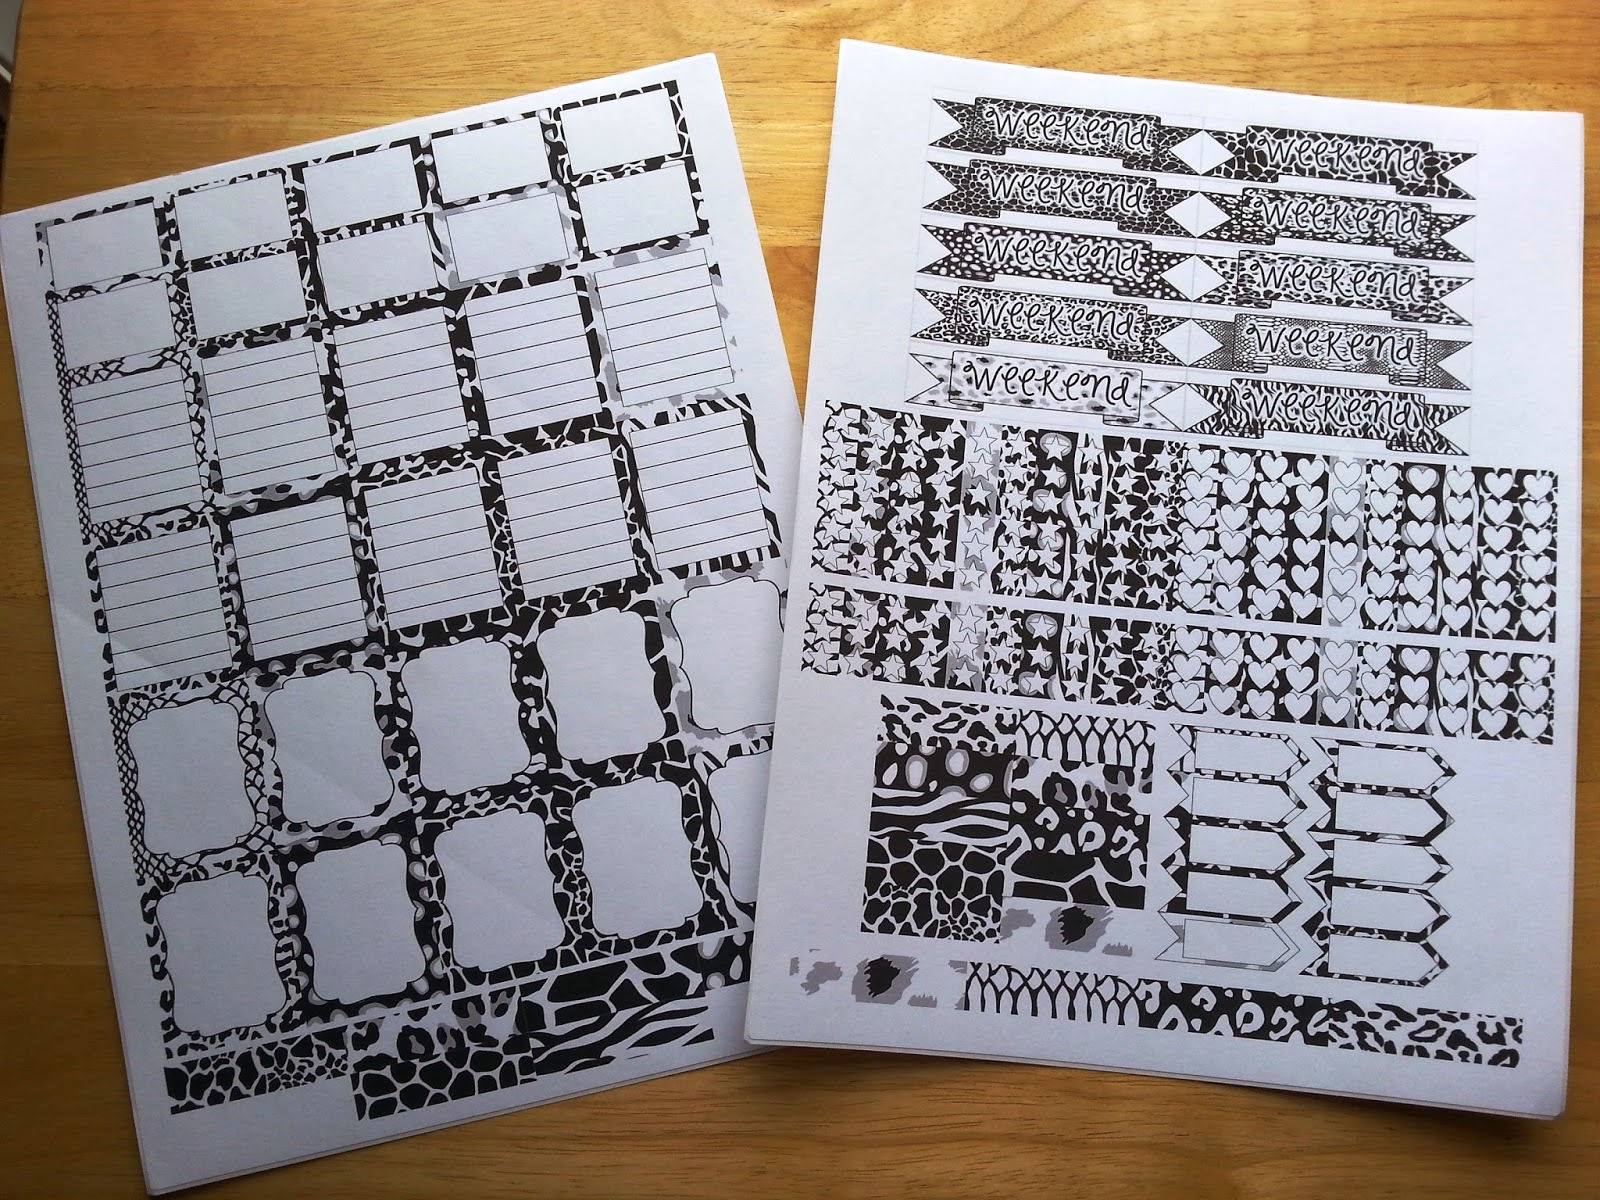
https://www.teacherspayteachers.com/Product/Animal-Print-Planner-Stickers-1706935

It's a PDF with 110 stickers for your planner!
(no actual stickers are sent to you - you can print and cut as many times as you'd like!)


Each sticker comes in 10 different patterns!

You also get instructions for printing and cutting
(more than one option)


OH! I am giddy with excitement for these! 

If you got here from Instagram and aren't a teacher - no worries! A Teachers Pay Teachers account is free, and you can sign up even if you aren't a teacher! (My sister is a vet student - she has an account for finding adorable clipart!)

I will be making additional sets in other patterns too!

I hope you enjoy!

 photo Signature_zps73d808b4.png

Erin Condren Life Planner - Stickers!

Saturday, February 14, 2015

Instagram